
I love all things burlap. It has such an awesome shabby texture. Did you know you can print on burlap {or just about any fabric}? All you need is some burlap, freezer paper and a printer.
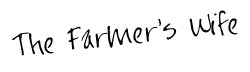
First, make your saying or design in whatever program you would like such as photoshop or word. I used John 3:16 for my wording and made it fit on a standard 8½ x 11 piece of paper. I used 2 different fonts and I stuck with bolder fonts since the burlap fabric is so coarse. I don't think a dainty font would show up very well. Once you are done with your design be sure to save it.

Next, take piece of burlap a little large than a 8½ x 11 and cut a piece of freezer paper about the same size and place it on top of the burlap shiny side toward the burlap. Use an iron on medium setting and iron the wax paper on the non-shiny side. It will then stick the freezer paper to the burlap. Next use a blank piece of 8½ x 11 piece of paper and lay it over the top of the burlap and freezer paper that is now stuck together for a pattern and cut the burlap and freezer paper to an exact 8½ x 11. Then place your burlap and freeze paper into your printer so it will print directly on the burlap side. Print your image.
Once your image has printed your can peel off the freezer paper. I waited for a few minutes to allow time for the ink to dry....just because I was being very cautious.....for once. There you have it...printed burlap fabric.

I decided to make a picture with mine. I used and old picture frame that didn't have a back.

I painted the frame with a light coat of white paint. Then I cut a piece of cardboard to fit the opening.

I covered the cardboard with scrapbook paper using Mod Podge. I glued some ribbon on to cover the seam from the two pieces of scrapbook paper. I made some fabric rosettes {just like the ones I made here} and burlap flowers with coordinating fabric. I used hot glue and attached buttons to the top of the flowers. Then I glued the flowers to the covered cardboard. I sprayed the back of the printed burlap with spray adhesive and stuck it onto the covered cardboard as well.


Voila, a cute little piece to hang in my home.
{{{HUGS}}}


I've always tought that burlap would be to thick and bumpy for the printer, but obviously I was wrong :) Your wallhanging turned out really nice.
ReplyDeleteWish you a good day!
This is genius! Thanks for sharing your tips!!
ReplyDeleteThat is darling! Great tutorial =) Have to store that in my to~do file ;) Blessings. Shannon
ReplyDeleteI love this idea! Definitely going to give this a try! I'm your newest follower and would love it if you would follow me!
ReplyDeleteLeAnn
You have been awarded the Liebster blog award. Please see it here: http://themodesthomestead.blogspot.com/2011/11/liebster-blog-award.html
ReplyDeleteSo beautiful! I love this, you decorated the burlap so well! I so need to try this method, I'm a burlap fan as well!
ReplyDeleteThanks for explaining! What a great project! Love the verse, too! :) Have a great weekend! I'm your newest follower! :)
ReplyDeleteGreat idea...thanks for the instructions.
ReplyDeleteHi. I found you from Funky Junk's SNS party. Love your blog. I am your newest follower.
ReplyDeleteI love your picture! I found you on Funky Junk! Great verse.
ReplyDeleteThat's fantastic. Thanks for sharing your creativity.
ReplyDeleteBless you.
Thanks for sharing! I found you at Funky Junk SNS.
ReplyDeleteAmazing simple craft, thanks for sharing!
ReplyDeleteLove this project! I will try to use when I make a few market tote bags this week. Check out my blog to see photos of quilts and bags and fun stuff I create.
ReplyDeleteThe freezer paper is a great idea. I use full-size adhesive labels, which are very expensive. This is a much more practical alternative. Thanks for sharing.
ReplyDeleteI featured this today! Come check it out and grab a button:)
ReplyDeletehttp://kim-toomuchtimeonmyhands.blogspot.com/2011/11/good-morning-sunshine.html
Love the tutorial, the verse, and the wall art! It is really pretty! I would like to have you share this tutorial at my party, if you would! http://theshadyporch.blogspot.com
ReplyDeleteBrilliant...can't wait to try this myself. Really love that verse. Happy Projects!
ReplyDeleteSherry
What a great idea. Will try this for sure.
ReplyDeleteAny help for getting the printer to accept the extra thickness through it? Mine feeds it, right up to the spot BEFORE the ink hits the burlap & won't feed it any further... Any help would be appreciated!
ReplyDeleteAnonymous, I would check your printer settings and see if you can select a thicker paper to print on. Good luck!!!
ReplyDeleteI seriously love the idea of printing on the burlap. I bought a new kodak ink jet printer. Followed all of the directions. Would not go through my printer, says paper jam. UGH aggrivating! I went into my printer settings but couldnt find anything for changing the paper thickness. :(
ReplyDeleteI was just wondering if anyone knows if this damages your printer after printing on burlap several times? Seems like all that lint would build up.
ReplyDeleteCourtney, I have not had any issues with my printer so far. Good luck!!
ReplyDeleteAn easier and less costly way to print on burlap or any other fabric is by using large adhesive-backed shipping labels, which acts as the carrier for the fabric to be inserted into an inkjet printer.
ReplyDeleteI wonder if you could spray alcohol on something like a cover of a book or old newspaper and lay it over the burlap after you iron the stuff to the fabric? I hope my question made sense lol.
ReplyDeleteI saw great prints here: https://www.etsy.com/shop/AirleighSouth
ReplyDeleteugh. will not work in my printer. what type of printer do you have? I use a brother.
ReplyDeleteI have an HP printer.
DeleteThis would be great, but you really should proofread. "Viola" like the musical instrument? And, "course" as in a three course meal? I think you meant "voila" (there's an accent in there) and "coarse."
DeleteCan you please tell me what fonts you used on your John 3:16 verse?
ReplyDeletedo I use freezer paper or wax paper freezer paper? Freezer paper does not have the wax coating,
ReplyDeleteand my wax paper will not stick any suggestions.
I am having the same problem....my wax paper will not stick...
ReplyDeleteGenius!! My freezer paper stuck, no problem. I just looked at the box and it doesn't say anything about wax. It's just regular old freezer paper with a shiny side.
ReplyDeleteI tried this first on burlap and had the same problem other people mentioned. The burlap was too thick. (but I'm going to look at the printer settings when I finish this comment.) Then I tried muslin and it worked beautifully! My husband better prepare himself- this has opened up a whole new world to me. lol
What do you do if the ink does not dry. It has been a couple hours and it still comes off if you touch it. Would using a paints sealer or hairspray work?
ReplyDeleteAfter I print onto Muslin, I heat set it by placing a piece of muslin over the print and iron. I don't necessarily move the iron back and forth. I set it onto muslin for several seconds and then move to another section to heat set.
DeleteI came to this blog and it helped me to add few new points to my knowledge. Actually, I am trying to learn new thing wherever I find. Impressive written blog and valuable information shared here.
ReplyDeleteโรงพิมพ์ราคาถูก
It's an interesting and informative article..!! Thanks for sharing. To know how to set up and fix a Epson printer issues, Check in to our site..!!
ReplyDeleteBrother Printer Setup | Brother Printer Installation | Brother Printer Driver | Brother Printer Wireless | Brother Printer Printing | FAX | Brother Printer Troubleshooting