Tuesday, February 14, 2012

Transfer Photos to Wood....AND a Little Rambling

If you are visiting from Pinterest I would like to thank you for taking time to check out my project!!!  I have another method on transferring an image which you can check out here.  You can now keep up with The Farmer's Wife on facebook by liking my page!!!  Thanks again for stopping!!!

Okay I am warning you this is a long post because I feel like being a chatty Cathy.   Therefore, a little bit of rambling before I get to the project....

In our household lately we have managed to have three kids get hit with ear infection.  OUCH!!!!  It is something we have dealt with a lot.  All of our kids have battled ear infections and our oldest two daughters got their first ear infection at 1 week and 3 weeks old.  I have a "newer" understanding for these poor kids because when I was pregnant with our son {who turned 5 yesterday.....waahhhhh my baby is growing up too fast} I got one heck of an ear infection and tylenol did not help with the pain.  It was probably the most painful thing ever.  I would have rather been in labor.  It wasn't that the pain was extremely severe, but it was constant and I didn't feel any relief for 3 days.  Needless to say, I have grumpy kiddos lately....and I TOTALLY understand.  Then throw a flu bug on top of that and you can about imagine what it has been like around here.

We had the unfortunate event of having our sewer back up right before Christmas.  Could this be linked to the recent illnesses going on in our house??!!??  The insurance adjuster came and said to remove all the carpet {ugh...we remodeled our entire house 3 years ago which included NEW carpet}.  We then had to have a professional cleaning service come in and spray chemicals to kill off any bacteria.  They brought in fans and dehumidifiers along with large sheets of plastic to section off the basement.  It sounded like we had a jumbo jet taking off in our basement for three days.  I had big plans to get the new carpet in right away so we could get back to "normal".  After searching for carpet that would compliment the basement stairs {yes, I am VERY picky} I finally found THE ONE!!!  Well, THE ONE was out of the budget that the insurance would allow....however we can pay the difference.  Then I find out the carpet installers are booked 6-8 weeks out....UGH!!!  My plan of having this carpet installed within a couple weeks of our "back up" was not going my way.  So here we are 2 months later and guess what??????......I still don't have carpet!!!!

I decided it was time to get a new comforter for our bed.  The walls in our bedroom were kind of a deep terra-cotta color.  I remember the color sample said Firewood.  My thought was to get something neutral so I didn't have to paint the walls.  After painting ever square inch of our house inside and out I really have had no desire to paint.  I found this quilt and loved it!!!  It was on sale for an incredible price so I ordered it along with the pillows and shams.  However, they were out of the Euro Shams which totally disappoints me so I have been on the hunt for something similar with the same great price they offered.  I haven't had luck finding anything....yet.

After putting the new quilt on our bed and admiring it I started to get the urge to paint.  So within 20 minutes of that urge I headed to the hardware store to grab some paint samples....you know......to get some ideas.  A half hour after visiting the hardware store I headed home with a couple  samples gallons of paint.  I justified this because I figure it is much easier to paint without the carpet in so I might as well do it NOW.

While waiting for paint to dry {literally} I decided to tackle a photo project.


I started out with a decorative board I bought at Hobby Lobby for 50% off.


I lightly sanded the board so it would be smooth to make the photo transfer easier.


Then I gave it one coat of walnut stain.


Next I gave it a light coat of white paint.  After the paint was dry I lightly sanded the edges to give it the shabby look and allow the color of the stain to show through.


Now for the fun part.  I decided on a black and white photo of my girls and printed it off on fabric transfer paper to my desired size.  I allowed to ink to dry completely.  PLEASE NOTE: If you do this project and your photo or design has wording you will need to mirror your image.  You can do this in a photo editing program or possibly in your printer set up.


Next I traced the shape of my board on the back of the printed photo and cut it out.


I lined up the photo on the board {photo facing the board} and used an iron on the highest setting {DO NOT USE STEAM} and ironed the photo transfer paper for a couple minutes making sure to burnish it as I went.  After the paper is heated up gently pull the paper back.  If it is not separating gently put the paper back down and iron some more.  I found it worked best to keep the iron on the paper while pulling it up {as shown in the photo below}.


You can see that some of the transfer paper was not quite ready and I have a little peeling effect going on.  I was able to smooth it up a little.  Don't rush and hopefully you won't have that happen!!

The finished project looks shabby and I love it.  I attached some black ribbon to compliment the black and white photo and hung it on my wall.


  I have another method of transferring photos to wood that I will share once I finish it.  Thanks for stopping by.

Ohhhhh

{{{HUGS}}}



Photobucket
Funky Junk's Saturday Nite Special
UndertheTableandDreaming

Saturday, February 11, 2012

Cold Calves

The plan for our household this morning didn't go as planned.  Part of living on the farm.  Our middle daughter had a basketball game in a town 30 minutes away.  My hubs asked me to bring her to the farm and he would take her from there.  When we arrived at the farm where my hubs was checking cows he asked me if we had any colostrum.  Uh oh, that means we have a newborn calf in trouble.  He also said he was going to have to pull a calf.  The newborn calves took priority and we did not head to the game.  I headed home to mix up the colostrum in the tuber {esophageal feeder} and grabbed a couple more kids to come watch.

When I returned to the farm the heifer had her calf on her own so we didn't have to pull it.  The baby calves were so cold because the temperature was a whopping TWO degrees out.  You can see the steam coming off the wet baby calves when it is this cold.  Both of these new babies were born to first calf heifers {meaning they have never had a calf}.  First calf heifers can be kind of stupid because this is a new thing for them and they are not sure what to do {kind of like being a first time parent}.  If the heifer doesn't claim the calf we end up with a bucket calf.

My hubs decided to go ahead an tube both the new babies because the heifers didn't seem to be interested in the calves.


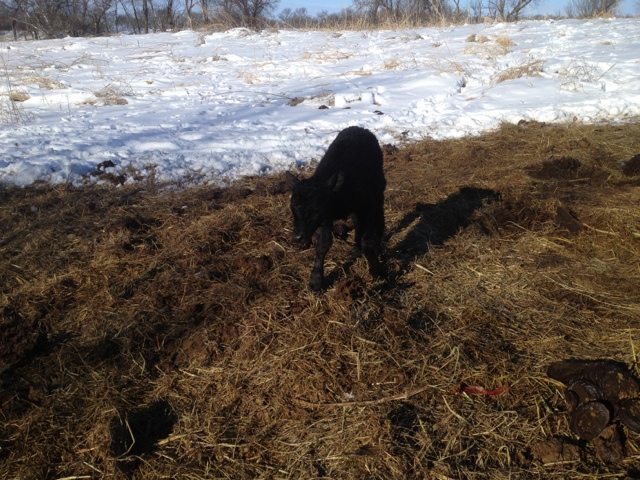
As soon as the older calf got some yummy in his tummy he stood up to discover the surroundings a little more.


Then the calf started walking around looking for his mommy.  His mommy was standing off in the distance and noticed the calf was up and moving around.


The other heifer took notice as well and headed back over to her newborn calf and started to lick the calf.  This is what is suppose to happen!!!  The mother cow licks the calf dry to help warm them up.


The other heifer finally decided to head over and take claim to her calf. 


 All is good!!!


{{{HUGS}}}
The Farmer's Wife


Friday, January 27, 2012

My BABY is turning 5!!!

I can't believe that my baby will be 5 in a few weeks!!!  Time just goes to darn fast and my babies aren't babies anymore.  My son can't wait for February 13th to arrive so he will officially be FIVE!!!  He is still my baby....even if he is five!!

I wanted to start documenting my kids on their birthday so in years to come we can go back and see how they have changed.  I don't know why I didn't start this sooner.....like 13 years ago when my oldest daughter was born.  Anyhow, on with it from here on out.


When I "interviewed" my son this morning I was surprised to learn his favorite color is brown.  Usually, it is green or yellow {something about tractors...} and a BULL RIDER...this mama doesn't think so!!!!  When I asked him who his role model was he responded "what is a role model?".  I explained what a role model is and he had the perfect answer to the perfect role model....his Daddy..awe!!!


Such a handsome lil' guy!!!

{HUGS}}}

Thursday, January 19, 2012

Cappuccino Muffins

Three of the many food groups in my life in no particular order are coffee, chocolate, and cream cheese.  Some days it is chocolate, coffee, and cream cheese.  Other days it is cream cheese, coffee, and chocolate.  Oh, these are not a food group???  In my own little world they are food group...if that matters...lol!!

Quick story first before I share the goodness of these muffins.  My mother in law is an awesome cook.  She and I are a lot alike when it comes to cooking.  We look at cooking as a way to relax and find it therapeutic if you will.  I was sooooo excited to give her one of her Christmas presents this year because it was something she didn't mention she wanted or needed, but I knew she would love.  I got her the butter lovin' lady from the south Miss Paula Deen's Southern Cooking Bible.  Maybe I was a little selfish in getting her this cookbook that I would thumb through while at her house, but I knew she would love it just as much as I would.  When she opened her gift she chuckled and told me she just bought the cookbook a few days prior.  WHAT!!! Great minds think alike!!!!!!  She got me the Taste of Home Baking Book for Christmas PLUS she gave me the "extra" Paula Deen cookbook.  SCORE!!!!

Needless to say, I have been rummaging through these cookbooks and found the recipe for the Cappuccino Muffins in the Taste of Home cookbook and couldn't wait to make them.  Moist coffee flavored muffins with chocolate chips and a delicious coffee flavored cream cheese spread just speaks to my soul....like deep down....I don't care it is 10:30 at night I must make these NOW kind of deep!!!


Preheat oven to 375 degrees

Espresso Spread:
4 ounces cream cheese, softened and cubed
1 tbsp sugar
1/2 tsp instant coffee granules
1/2 tsp vanilla extract
1/4 cup miniature chocolate chips

In a food processor or blender chop the chocolate chips up till fine.  Add remaining ingredients and process until well blended.  Transfer to a small bowl, cover and refrigerate until serving.

Muffins:
2 cups all purpose flour
3/4 cup sugar
2 1/2 tsp baking powder
1 tsp ground cinnamon
1/2 tsp salt
1 cup milk
2 tbsp instant ground coffee granules
1/2 cup melted butter
1 egg
1 tsp vanilla extract
3/4 cup miniature chocolate chips

In a large bowl, combine the flour, sugar, baking powder, cinnamon and salt.  In a small bowl, stir milk and coffee granules until granules are dissolved.  Add butter, egg and vanilla; mix well.  Stir into dry ingredients just until moistened.  Fold in chocolate chips.

Fill greases or paper-lined muffin cups two-thirds full.  Bake for 17-20 minutes or until a toothpick comes out clean.  Cool for 5 minutes before removing from pans to wire racks.  Serve with espresso spread.  Makes approx 14 muffins.


Enjoy!!!

{{{HUGS}}}


Monday, January 9, 2012

Chocolate Chip Scones

These scones are incredibly easy to make and you could easily substitute blueberries, cranberries, apples, or raisins for the chocolate chips.


Here's what you need to whoop these babies up:

1 cup all purpose flour
3 tbsp white sugar
1½ tsp baking powder
Pinch of salt
2 tbsp cold butter
1 egg
3 tbsp heavy whipping cream
3/4 cup chocolate chips

In a bowl, combine the flour, sugar, baking powder and salt.  Cut in butter until crumbly.  In a small bowl, combine egg and cream; stir into dry ingredients just until moistened.  Fold in chocolate chips.

Turn onto a floured surface; knead gently 6-8 times.  Pat into a 10 inch circle.  Cut dough into six wedges.  Separate wedges and place 1 inch apart on an ungreased baking sheet.  Bake at 350 degrees for 18-20 minutes or until golden brown.  Remove from pan to a wire rack.  Serve warm.

I like to add a little powdered sugar glaze to mine....you know just to add a few more calories that I desperately need.

For the glaze:
3/4 cup powdered sugar
1½ tbsp milk

Add milk to powdered sugar and whisk until smooth.  If you would like it thicker add more powdered sugar, if you would like it thinner add more milk.  

Now, go have a glass of milk and a chocolate chip scone!!

Enjoy!!!

{{{HUGS}}}